Wednesday, October 31, 2012

Limited Edition Favourites

Urban Decay 15th Year Anniversary Eyeshadow Palette - highly-pigmented, fantastic quality of eyeshadows, apart from a matte black and a navy blue all of the eyeshadows are shimmery. It includes neutral colors, highlight colors, pinks and purples and a gorgeous metalic grey shade. 


The colors are Midnight Rodeo, Midnight 15, Vanilla, Flow, Chase
                       Tainted, Junkshow, Omen, Evidence (matte), Deep End
                       Deeper, M.I.A., Ace, Blackout (matte), Half Truth

My most used colors are:


Fortunately, some of the eyeshadows are still available in singles: Midnight Rodeo, Vanilla, Chase, Omen, Evidence, Deep End, Blackout

I would definitely recommend getting Chase (gorgeous bright golden-bronze), Omen (bright metalic purple with blue shift), Evidence (matte deep navy blue).


Urban Decay Naked Basics Palette - Still available!!!! the third Naked palette that includes 6 basic, all-matte shades. You really have the absolute basics in this travel-friendly, sleek palette. Great palette for every day looks.


The colors are Venus, Foxy, Walk of Shame, Naked2, Faint, Crave (deep brown-black)

Foxy and Faint are also available in singles.


theBalm Cosmetics Balm Jovi Rockstar Face Palette - comes in the cuttest packaging which includes 12 great high quality matte, shimmery and mettalic eyeshadows, as well as a luminizer, a pinky blush and two lipglossses/cheek colors. Such a cool and fun palette with a great combo of colors!


Bobbi Brown 20th Anniversary Lip Palette - includes 20 Bobbi Brown lipsticks from nudes, pinks, corals, peaches to plums and reds. Unfortunately it's no longer available, however, you can still find similar colors in the current lines. These lipstick are richly pigmented, creamy, and long-lasting all with matte finishes. 


The 10 colors you see on the top were the original lipsticks that Bobbi Brown first launched; these are mostly browns, nudes and reds. There's a salmon color and also a pink.


Below you can see 10 more modern, more colorful lipcolors that were part of the lipstick range. There's a lot of pinks, plums, corals and a bright red.


My favourites from the palette are:


I also LOVE Salmon but I'd run out of that color already, so I can't give you a swatch!


Some similar colors currently available are: 

1) Raisin  2) Desert Plum (Bobbi's Essentials Line)

3) Calypso 4) Pink Lilly 5) Red Carpet (Creamy Matte Lip Color Line)


Saturday, October 27, 2012

Castor Oil Natural Hair Mask

During the week I'm quite busy with work and things, so apart from conditioner sprays I don't really do much with my hair. However, at least once a month I tend to use hair masks which make up for my lack of hair care on the weekdays.

My favourite homemade hair mask of all time is the CASTOR OIL HAIR MASK which makes my hair super soft, very nourished, shiny, and adds a silky touch to it. 

What you need for the mask:   

1)  castor oil  (can be purchased from pharmacies, beauty/health supply store)
Wallmart Castor Oil


2)  egg yolk  (probably not hard to find :))


It's a very easy mask to make. You pour about 2 tablespoons of castor oil (for long hair) into a bowl and mix it with the egg yolk, then you apply it to the hair. You shouldn't use too much of the castor oil and avoid putting any on the roots if you have oily roots to begin with. Then put a plastic wrap around your head to keep it warm. Then leave it on for 2-3 hours for your hair to really absorb all the goodies.

Castor oil (which derives from ricinus communis) has tons of benefits; its antibacterial properties  protect your hair from infections, helps with hair breakage, promotes hair growth, softens and nourishes your hair. The same benefits apply for skin care too. 

Egg yolk is a perfect conditioner as it repairs, strengthens, and moisturizes damaged hair.


Do this mask once or twice a month and you will see and feel the difference!

Friday, October 26, 2012

7+1 Essential Makeup Brushes

I realized early on how greatly makeup brushes contribute to the outcome of my makeup looks. To achieve a beautiful makeup look it is essential to use the right tools. Think of yourself as a painter, you cannot just use one brush to finish up a picture. You might do some detail work, you might need some smudging, etc...the point is you need tools for all sorts of purposes.

I'm in love with makeup brushes!!!  I could buy a million of 'em!! haha! You can select from a wide range of makeup brushes, but you do not need to have each and every of them. Unless you're a makeup artist you only need a basic set of brushes that will help you to 'paint your own canvas' for any occasion:

Powder brush /a very soft, large fluffy brush /
-  for powder and bronzer application
AVON All Over Face Brush

Stippling brush /soft, dual-fibre brush/
- for applying (liquid) foundation, cream blush, cream highlighter, cream bronzer
Real Techniques Stippling Brush

Cheek brush  /soft, dome, rounded tip brush/
- for blush and highlighter application as well as for contouring with a bronzer, or even powder application to smaller areas
OCC Vegan Small Powder/Blush brush

Angled Eyeliner brush /small brush with dense bristles cut on an angle/
- strengthen the eyebrows, applying gel liners

OCC Angle Synthetic brush

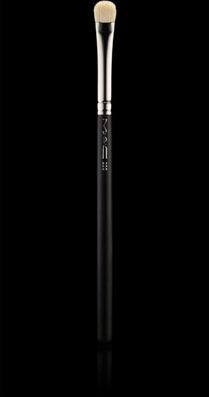
Eye Shadow brush /soft brush with rounded bristles with beveled edges/
-applying eyeshadow wet or dry onto the eyelid
Blending brush /soft, fluffy, dome brush with long bristles/
-blending eyeshadows, crease work, and buffing concealer under the eyes

MAC 217 Blending Brush
MUG Stiff Dome Brush (cheaper alternative)

Detail Brush /soft, tiny brush with dense bristles which are curved to a point/
-  for any detail work such as smudging eyeshadow under the lower lashes, highlighting in the tear dot, as well as gel liner application, lip lining, and concealing small blemishes
MUG Eyeliner Smudge brush


+ Eyelash curler  
(this is not a brush, but a must have makeup tool for fabulous eyelashes)

ELF Eyelash Curler

Tuesday, October 23, 2012

Natural vs Synthetic makeup brushes

MAC 134 Large Powder Brush

NATURAL makeup brushes are called so because they have natural fibers which are derived from animals. The popular ones are goat hair (white) and sable hair which are both really soft, offer great blending ability, while allow for natural-looking application. These bruhes are more sturdy and definitely good quality.


Best to use with: powder-based products such as powders, blushes, and eye shadows

Best to use for: blending, patting down color on the eyelids, intensifying color

Bests on the market: most high-end cosmetics such as MAC Bobbi BrownTom Ford (or Sigma as an inexpensive alternative)


Real Techniques Powder  Brush


SYNTHETIC brushes have bristles usually made from nylon and taklon, therefore, these brushes are cruelty-free as well as less expensive. But keep in mind that it's hard to find really good quality synthetic brushes! Most drugstore ones are not good enough. 
They are also really good for people who might have allergic reaction to animal hair. They tend to be more stiff than natural hair; therefore, they allow for a more precise application. 
Good quality synthetic brushes can be used both with powder-based and cream-based products. 


Best to use with: creamy products such as liquid foundations, concealers, cream eye shadows, cream blushes, gel liners, lipsticks, etc...

Best to use for: buffing or stippling foundation, applying mineral powders, blending in concealer, applying cream highlighters or cream blushes, applying natural-looking bronzers, lighter application of color, eye-lining, lip color application

Bests on the market: Real Techniques, Cozzette, Obsessive Compulsive Cosmetics (all can be found on Love Makeup UK)


Next article will be about the individual brushes and their uses.

Monday, October 22, 2012

What to look for in a Makeup Brush


When it comes to makeup brushes, there are plenty of things we need to take into consideration. From application and techniques to brush types, so it is a gigantic topic. Therefore, this week I'm going to write articles that will hopefully cover all the issues that concern makeup brushes. 

This article will be about choosing the right brushes which I find is a topic people often disregard or at least do not pay as much attention to as it'd be needed. 

Even before we go out to get some brushes, we need to discuss what are those brushes that are truly worth our money to be spent on.

Size Does Matter  :)

This is rule number 1! The size of the brush should never be disregarded. Each brush has a purpose to fulfill so for instance; if you buy an over-sized brush then chances are it won't be effective in use. Just to illustrate this for you guys, sometimes powder brushes are advertised as a multi-purpose products (which btw I love) such as a brush that can be used to apply powder, blush and even bronzer. Partly I do agree, some can be used for all these purposes but when you really come to think about it a powder brush is a large fluffy brush. So, I can't really say that a powder brush is just as good of a dupe for a blush brush due to the size. That's why we have separate brushes specifically designed for different purposes. A blush brush is also a large fluffy face brush but it only needs to be wide enough to cover the apples of the cheeks, whereas a powder brush or even a kabuki cover a larger area of the face, so the application won't be precise.


The bottom line is when you buy a brush of any kind, always check the size compared to the part of your face where it will be used. If you want to buy an eyeshadow brush, check that the brush covers only your eyelid and do not extend over the crease. Oh and don't forget the size of the handle should not be over-sized as well!


Quality over Quantity

As for me, the biggest investment in makeup is in high-quality brushes. Don't get me wrong I'm not saying that you should go out and only get fancy MAC or Suqqu brushes, but to point out that in the long run it's a much better investment if you buy high-quality brushes than cheap, fake-hair drugstore ones.
Why? Longevity. A good brush will be effective, stay in good shape, and will work fabulously up to 10-20 years. It's a long time investment that's why the price tag on them is also higher (btw I do admit that there are some brushes that are ridiculously overpriced). 


Another reason in favour of the expensive ones is the quality of the bristles. A typical problem with the inexpensive alternatives is that they keep on shedding (hair falls out) or the bristles are not dense or stiff enough. This is something you cannot tell just by looking at the brush, you need to see it in action. I used to have a blending brush in which the bristles just did not move?? Concerning density, the expensive ones have much more hair in them that's why they are more dense. Again, it's just makes them more effective.

Last but not least, softness! Incredibly important!!! Do not ever buy a brush that is NOT soft, but instead feels very hard! Fake hair is like that too. Make sure before you buy a brush that you touch it! Just push it against your skin, move it around  a little and see whether it feels soft on your skin. I've learned this from experience; I actually bought an expensive brush which the minute it touched my skin felt so harsh. I kept on using it but it never got any softer :( and then I never reached for it anymore. Bristle-wise, you can come across makeup brushes with natural bristles or synthetic bristles, but still you always need to test them!!


Purposely made


As I mentioned, I love multi-purpose brushes, but not all brushes are capable of performing equally good in different areas. One more thing that is worth knowing is that packaging sometimes can be misleading, especially for those who are just starting in makeup and know nothing of brushes. I'm going to discuss the individual brushes in more detail later on, but for now, I just want to warn you that the packaging is not always right. You need to know how different brushes look like. Make sure you do some research beforehand; Youtube offers tons of introductory videos for brushes, many articles are written on this topic, etc...


That's all for the the first article on brushes, so stay tuned because I'm gonna dedicate this week's posts for makeup brushes only. Thanks for stopping by! :)

Saturday, October 20, 2012

Quick Crease Trick


If you don't really have much of an eye space between your eyes and eyelashes, or have hooded eyelids like me, an easy way to achieve a prominent but still natural-looking crease is by using a bronzer as a crease color. Especially if you also use bronzer to contour your face, it will blend in so naturally. 

Just make sure you use a matte bronzer with no shimmer which is a shade or two shades darker than your skin tone. Then apply the bronzer in the crease by using a blending brush (a soft, fluffy, natural hair brush with long bristles). 

My favourite bronzers are the Bourjois Bronzing Powders which come in a lot of matte and natural looking shades (for fair and natural skin tones). Unfortunately, they don't seem to have any for darker skin tones.


Friday, October 19, 2012

The Special Date Body Scrub


Ok, so it doesn't have to be done for a special date or a special occasion, I just call it this way because you get immediate results and you always feel like you're ready for something special.

Basically, it's a very organic body scrub which includes only 2 ingredients: 
- lemon juice (or fresh lemons)
- sugar

In the kitchen...
grab a bowl in which you mix  together some sugar and lemon juice. For a whole body scrub I'd say 10 tablespoons of sugar and 5 tablespoons of lemon juice should be enough. In case you need less, just use less. You need to test it out yourself to see how much you really need. The point is to avoid making it too liquidy, sugar should dominate more.

In the bathroom....
take a regular shower and then using this mixture scrub the desired areas. Make sure you avoid scrubbing bruises, scars or any sensitive areas! The good thing about sugar is that it's not harsh; therefore, it does not irritate your skin, while lemon juice has antibacterial properties and acids which help with exfoliation. 

Then just rinse it all off with some water. You will immediately notice how soft and smooth your skin feels, it's amazing! However, do not do this scrub every day, you know it's only for "special occasions", over exfoliation is not sexy! haha! 

So have fun with it!!!! Thanks for stopping by at my blog!


EXTRA TIP: shave after the scrub because it will make the razor glide so much easier and shaving will also be more effective.

Tuesday, October 16, 2012

Everyday Hair Care in less than 10 SECONDS

I have some very easy and fast hair treatment tips for you guys that you can do every day and it won't take you longer than 10 seconds. These are all leave-in products, so no effort really needed.

1) Spray Conditioners


Just shake it up and spray some conditioner onto your hair (either damp or dry). This will not only nourish your hair, but will also make it smooth and less frizzy. It helps big time with combing too! The one I'm liking at the moment is the Pantene Aqua Light Spray Conditioner. But you can find other great ones at any drugstore.
2) Hair Oil


This is very handy when you are on the go. You just put a tiny amount in your palm, rub your hands together and apply it to the hair (either damp or dry). It's very nourishing, it makes the hair feel soo soft and also promotes shine. It's a great product but I'd suggest you use it every two or three days because being an oil it can make your hair a little greasy. These hair oils are a little pricier , but I consider it a good investment because you don't  need to use it regularly and you just need a tiny bit.  I really like the Loreal Elvive Extraordianary Hair Oil, it is said to be good for all hair types. Also, Avon's Moroccan Argan Oil is great too!

3) Dry/Split Ends Serum


Again, just pump a little product in your hand and apply it on the ends of your hair for maintaining healthy ends. My all the favourite is Avon's Advanced Techniques Dry Ends Serum with an amazing bonus smell!


EXTRA TIP: dry hair absorbs all these goodies better than wet hair.

Sunday, October 14, 2012

How to remove makeup PROPERLY

It is a truth universally acknowledged that removing makeup at the end of the day is essential haha!
But seriously, it is very important that you don't sleep in your makeup. Especially, if you wear a whole face of makeup on a daily basis, you don't want makeup to plug your skin. It is also not really sanitary either. I always keep some makeup remover wipes with me, just in case if I'm too tired to do the whole face cleansing routine at night. I wouldn't suggest using those wipes every day, but occasionally it's perfectly fine.

How to cleanse our faces properly???
What you need: 1) cotton pads
                        2) makeup remover
                        3) some q-tips
                        4) soap (preferably organic)

I'll tell you what I do to cleanse my  face and explain why I do it this way.

STEP 1
I tend to use a makeup cleansing milk because it's very creamy and more gentle to the skin. I think you are better off with a creamy product than a toner because toners tend to be too drying on the skin. I like using Garnier's Clean&Fresh Complete Cleansing Milk with Grape extract.


My ultimate favourite of all makeup removers is Bioderma's Sensibio H2O which is great for sensitive skin, it doesn't irritate the eyes and removes waterproof makeup as well.

I put a small amount of the product on a cotton pad and gently cleanse my whole face. Then for the eye area I take another one and again GENTLY press it on the eye and leave it there for 10 seconds. The product will break down the makeup and you can easily wipe off the excess. Then you can take a cotton swab and put a little cleansing milk on it to reach the smaller areas, and also run it among the eyelashes.


STEP 2
Now you should have most of your makeup removed. But here's the TRICK!!! Afterwards, it's not enough to just rinse off your face with water because that does not get rid of all of the cleansing milk. That's why I use an organic face soap/black soap to deeply cleanse my whole face. So cleanse once more with the organic soap and your face will feel clean and fresh! I really love the Himalaya Herbals organic soaps, they're fantastic and cheap, and you can find one for any skin type. But any organic soap or black soap will do.


STEP 3
Dry your face with a towel which is used for your face only, and again be gentle, do not rub your skin just gently press the towel to your skin. Then apply some night creme on your face. The best night cremes are the ones which do not feel greasy on the skin, but have a long lasting hydrating effect for the night.

Saturday, October 13, 2012

Accessorize for the Season

I've just got back from an awesome shopping spree with my family. I had such a great time, we spent literally the whole day shopping!!! Traditionally, the Hungarian Glamour Magazine annually organizes a 3-day long shopping weekend in fall (also in spring). The magazine comes with a coupon catalogue in which different stores offer you usually 20% or sometimes even 50% off of their products for these three days. It's really a lot of fun, people walk around in the malls with the catalogue in their hands trying to find some really good deals. It's quite a budget friendly way of shopping for the season as well.

Before our trip to the shopping mall, I looked at some of Glamour Magazine's top picks for fall season, just for some inspiration. 


A must have for the season is the bejeweled collar which makes any sweater look special.


Another great one is the bow which you can put in your hair, on your clothes, on your bags, on your shoes, on your rings, etc...


  I also love the enormous statement earrings! They rock! :)

Sooo I managed to get my hands on some of these really amazing accessories that are so popular this season and totally complement my wardrobe. I just wanted to show you guys how you can accessorize according to the season just by getting some key pieces. 
Hope you'll like it! :)


1. Bejeweled collar (Six)
2. Bow earrings (Orsay)
3. Giant earrings (Payless Shoe Source)

Friday, October 12, 2012

While in the bathtub...

I wanted to dedicate my very first blog post to a fun beauty routine I've been doing recently. I'm sure we all have tons of beauty products in our bathroom drawers which are all sooo amazing and sooo good for us. I myself own a lot of goodies: face cleansers, masks, scrubs, serums...you name it! But honestly, having a very busy schedule I just cannot use all of these products regularly. After a long day of work, I just take a quick shower, remove my makeup and put on some night creme and off to sleep I go. I'd love to make the most of these products but who's really got the energy for facials or hair care at night??

So I come up with a beauty routine that involves 1) a facial, 2) a little hair care and 3) some teeth whitening performed all while you're in the bathtub. So here we go. 
First I cleanse my face, then I put on a nourishing or pore cleansing face mask. Then I apply my Plus White speed whitening gel with a q-tip on all of my teeth, then place a little rubber tray in my mouth. I kind of look funny but it's great, I'm telling you! :) Following this, I put castor oil or you can use olive oil on the ends of my hair which will contribute greatly to hair growth as well as keeping the ends healthy and strong. Then I take a bath for about 20 minutes which is enough for all these goodies to perform. I really like this routine because I feel like I did more than just the usual stuff and yet it did not take me any longer. 

So I hope that inspired you guys to try to come up with fun ways to make the most of your beauty products and also your time. I will list below all the products I like to use for such purposes. Hope that was helpful! Let me know how it went!


Left to right: Plus White 5 Minute Speed Whitening Gel (any drugstore), mouth tray (any sport supply store), castor oil (I got mine at a local pharmacy but you can use olive oil instead), Planet Spa Thailand Lotus Flower deep pore cleansing face mask (Avon)